The merge feature allows you to move a client to a different family file. This can be used if, for example, two family members were accidentally placed in separate files. Note that only one member can be merged at a time - to move multiple members, multiple merges are needed.
Step 1: To merge a member with an existing file, start by searching for the client. For steps on how to search for a client, see How to search for an existing client.
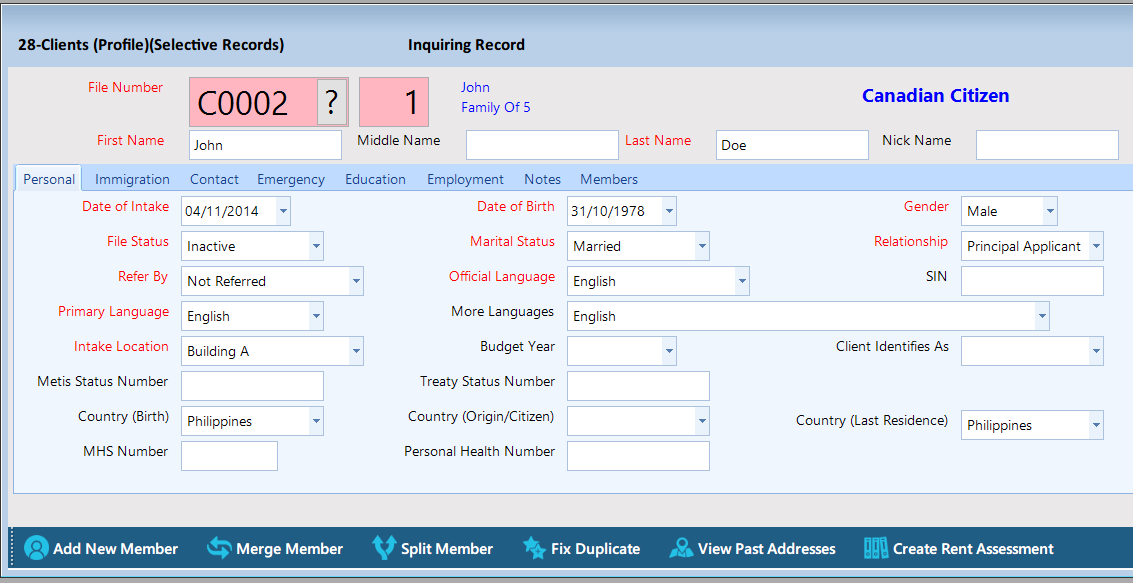
Step 2: Once the search is complete, you should be viewing the member that you would like to merge.

Step 3: Now, click "Merge Member With An Existing File" from the bottom of the Clients form.
Note that this button will only be available for users who have permission to merge members. Speak to your administrator if this button is not available.
Note that this button will only be available for users who have permission to merge members. Speak to your administrator if this button is not available.

Step 4: The "Merge Files" form will appear. From here you will be able to select the family file that you would like this client to be moved to.

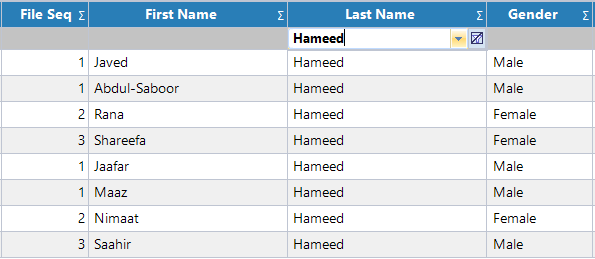
Step 5 (Optional): You can optionally use filters to assist in finding clients. To add filters to your data, follow the steps below:
- In the column you would like to filter by, click on the top blank cell.
- You can now either type criteria, or select criteria from the dropdown.
- Click OK. You will see the report change according to the criteria set.
- Repeat for any other fields you would like to filter.

Step 6: Once found, double click the client whose family file you would like to set as the merge destination. This will fill the "Merge into" field at the top with the file number and file sequence number of the client you clicked on.
(File sequence numbers are used to differentiate between different members of the same client file)

Step 7: Once the "Merge into the file" field has been set, click the "Merge Files" button on the right to perform the merge.
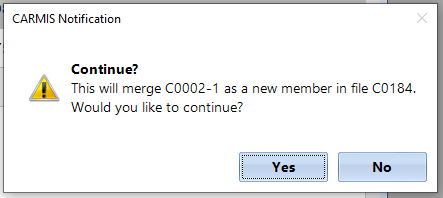
Step 8: A confirmation message will appear. Read the message and click "Yes" if you'd like to go ahead with merging.

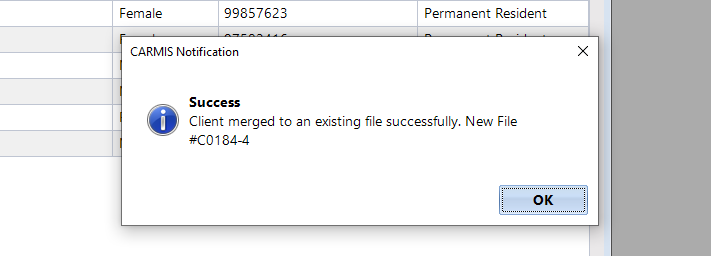
Step 9: Once the merge is complete, a message will appear to confirm the merge was successful.

